DIY Home Decor Summer Edition
Hello blog friends! It’s been ages since I’ve logged into this blog because life has been so full and busy these days. But I’ve had this idea to share for a while so now I’m finally getting down to it.
A few months ago I went on a bit of a DIY spree and decided to paint a bunch of pottery to use as decor. My goal was to re-do the upstairs mantle and also freshen up the kitchen island counter as well as the main table.


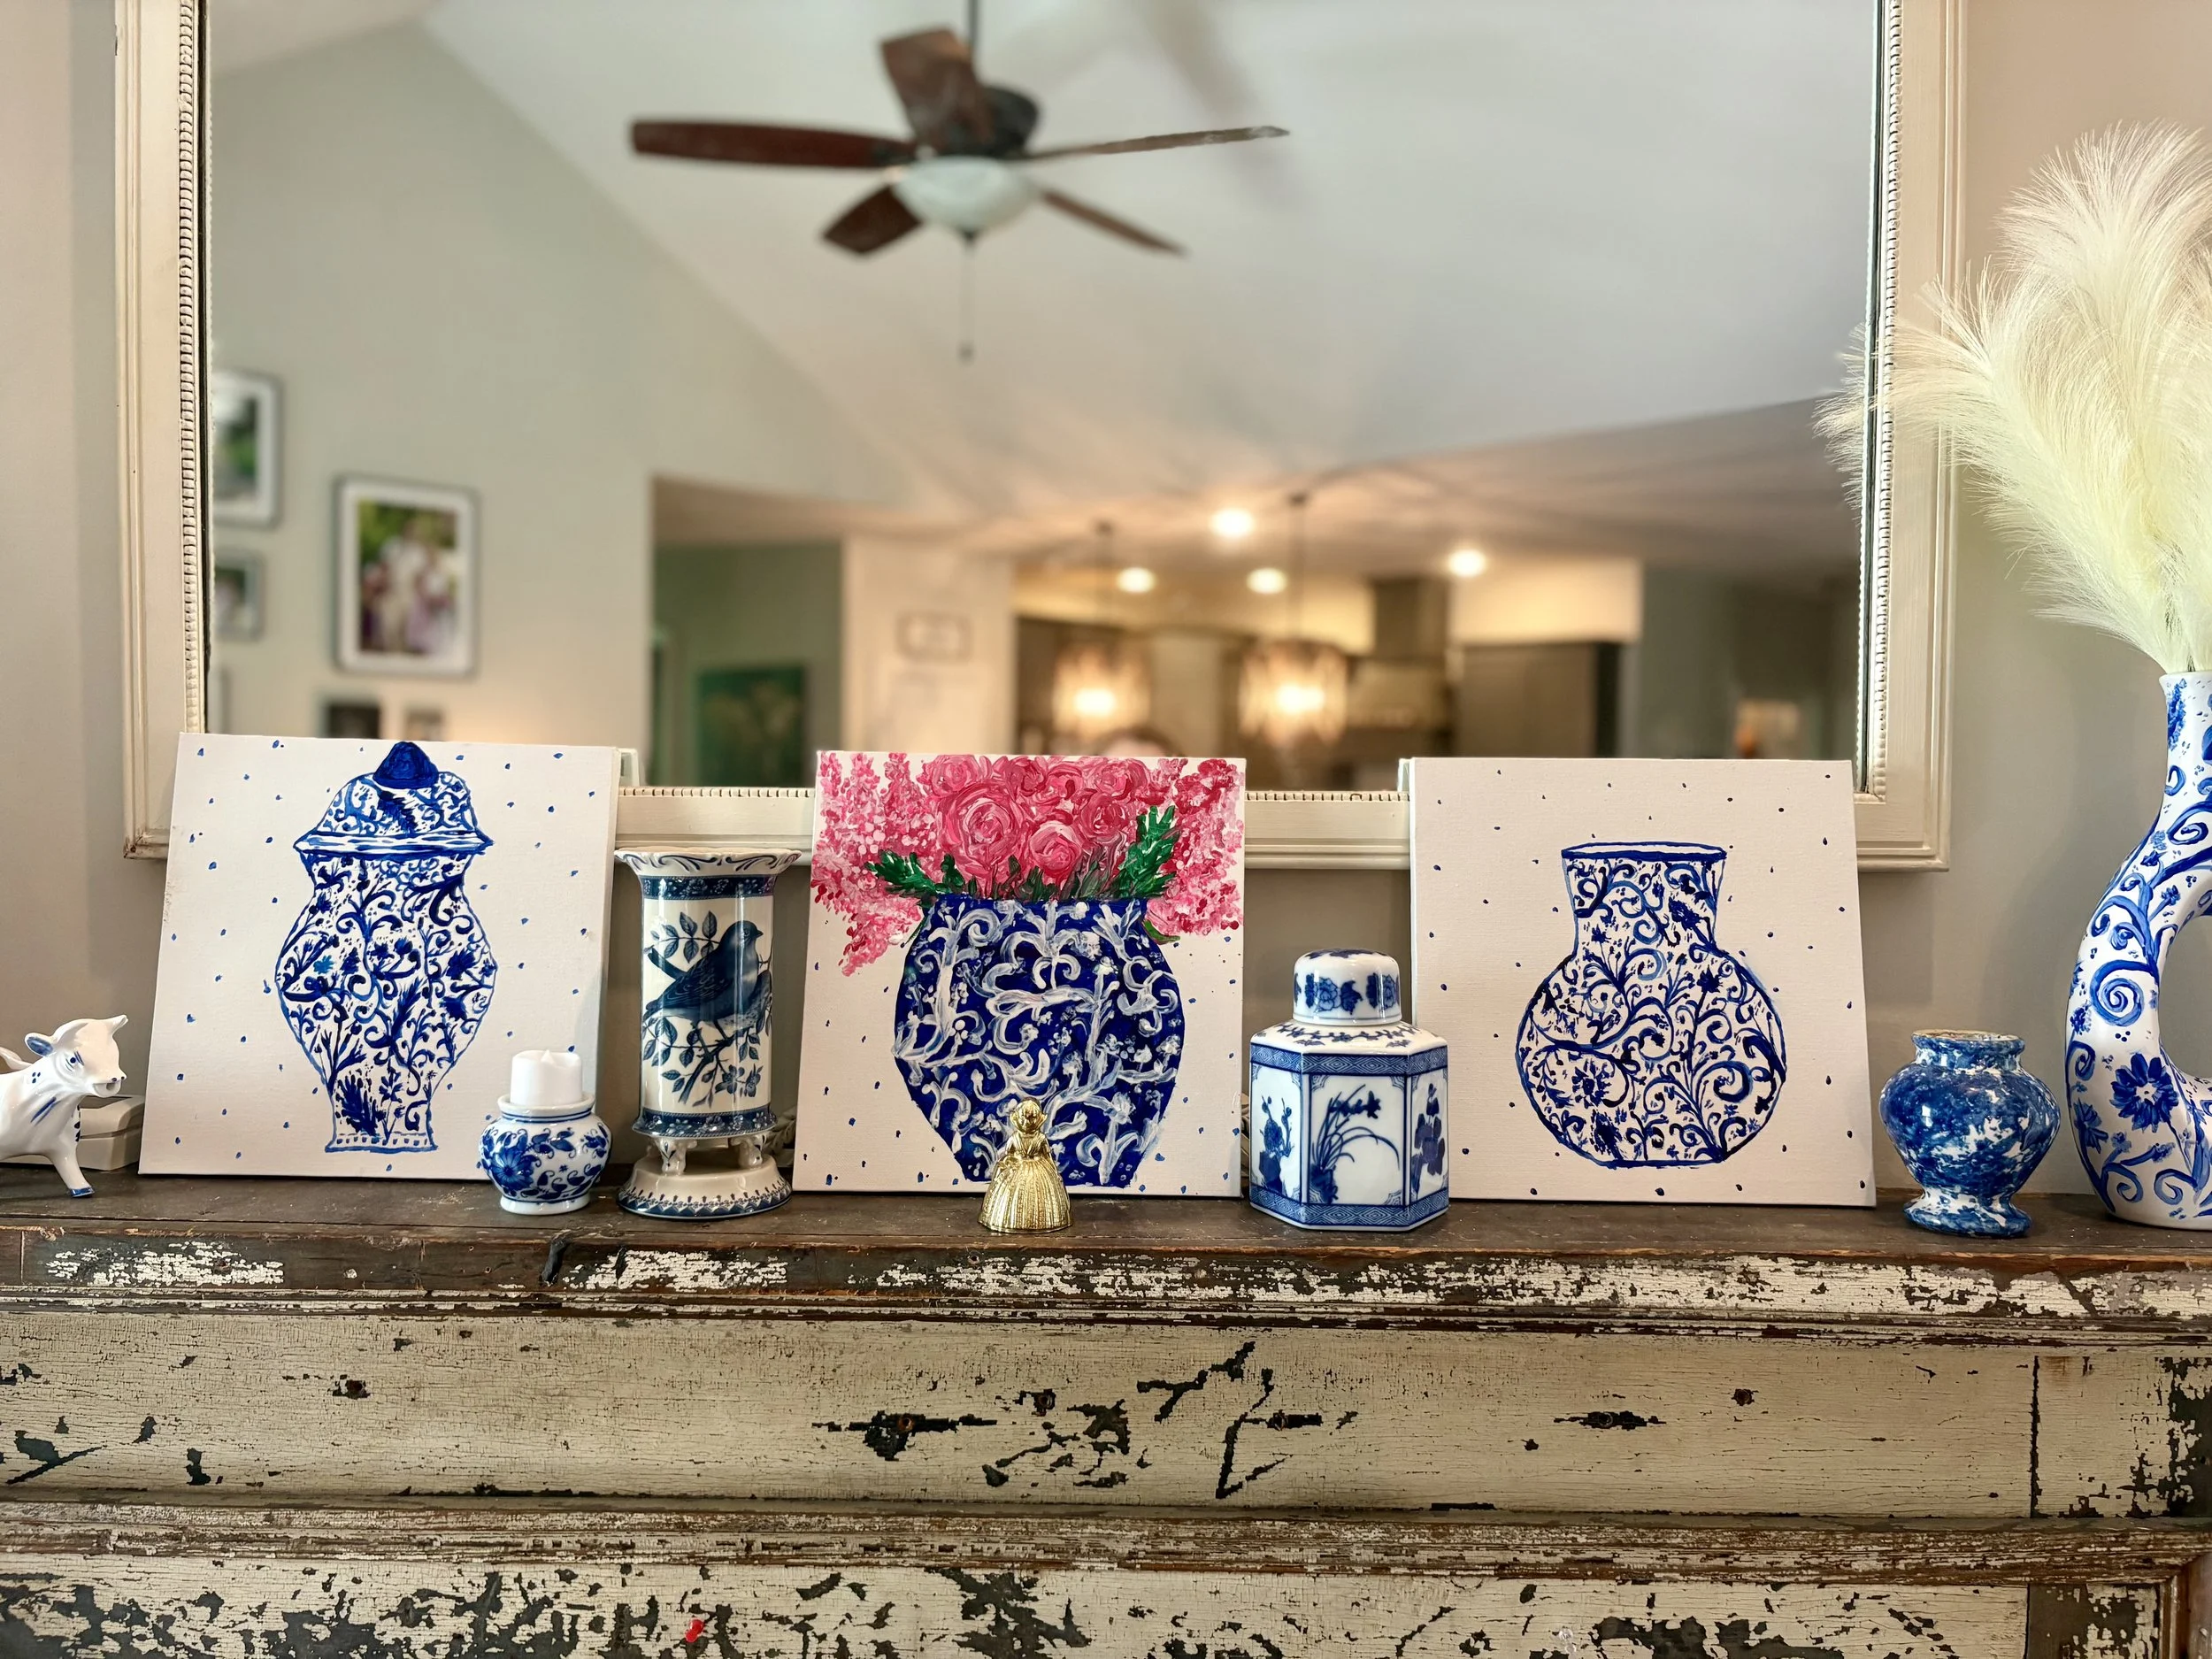
Let’s start with the main presentation—the mantle. The inspiration for the mantle initially began with the smaller chinoiserie glass pieces you see (a cow, and a few jars and vases). Those pieces were passed down from family and I always wanted to find a central place to display them. But of course I needed more to the mantle than a few pieces so I decided to then paint 3 small canvases with chinoiserie vases that I thought would compliment the look and fill in the space. Painting chinoiserie patterns is relatively simple if you look at a model throughout the process.
Aside from the canvas paintings, I also decided to fish around Hobby Lobby for some sort of decor to place on the ends of the mantle. I found those interesting open vases in an off-white and decided to go ahead and paint those chinoiserie style to match! I think they turned out pretty well. Once those were completed, I found some feather-like faux plants at Walmart to fill the vases out. I like the way it turned out and think it makes for a nice neutral mantle display when it’s not the holiday season.


Moving on to the next project! For a while I wanted to add my own creative touch to our counter space somehow in a way that would be decorative but somewhat neutral. I knew I wanted to work the display around the small chinoiserie vase. I started the project initially with the vase on the left. I purchased a plain, white ceramic vase from the Dollar Tree and decided to paint a simple black and white checkered design on it so it would be neutral enough to fit in with the black soapstone counter and go with any type of flower or plant arrangement. I’ll admit that the checkers are not measured to perfect symmetry, but I am happy with how it turned out. I filled the vase with a selection of leftover faux greens from our wedding and added some faux florals from the Dollar Tree to fit the spring and summer mood.
Because I loved how the vase turned out, I wanted to try adding something else to the counter display. This time I went to Hobby Lobby and found a white ceramic canister that came with a detachable ruffled lid. I wasn’t initially sure if I wanted to paint the canister checkered or in a chinoiserie design, so I decided to do a little of both. I chose a navy blue for the checkers to compliment the blue accents in our kitchen, and then painted a navy chinoiserie design on the detachable lid. I LOVE the way it turned out because sometimes I can use the lid as a separate dish and other times I can keep it closed and the patterns just make a fun combination.


Last but not least, I went for one last DIY vase about a month after completing the other projects. This time, I wanted to paint something a little different than the other patterns. Again, I found this larger, white ceramic vase at Hobby Lobby and knew that the taller size of it would make for a great table centerpiece. When it came to the design, I really made it up as I went along. I knew I wanted the base color to be black, but aside from that I had no concrete plan for the design. I loved adding the pops of white in various swirls and decided to add touches of amber and gold on a whim to top it off. Overall, I think it turned out well. When I saw these white, drooping faux flowers from Walmart I knew they would go perfectly with the neutral colors in the vase!
what do you think?
So, what do you think of my DIY decor projects? I had so much fun making them and love being able to put my creative stamp inside our home. Whether you are artistic or not, I highly recommend trying a DIY vase project sometime. If you aren’t a painter, you could even try decoupaging a vase with some magazine clippings or colored tissue paper of your choice. Either way, I hope this post inspires your creative juices!